Installing Wishlist Snippets ✏️
If you would like the Wishlist button to be placed in a specific spot on your product pages, or to be shown on your collection pages, some manual code installation in your theme is required.
When you first installed EasyAccounts, we attempt to install the snippet required automatically, however, due to variations between themes, sometimes this does not work. In order to verify the installation of the snippet, or to manually install it yourself, please follow the below instructions:
Step 1: Snippet Upload
Verify EasyAccounts’ snippet is uploaded into your theme by navigating to Shopify Admin -> Online Store -> “Your Theme” -> Actions -> Edit Code. In the left hand bar, you should see this file under the snippets section.
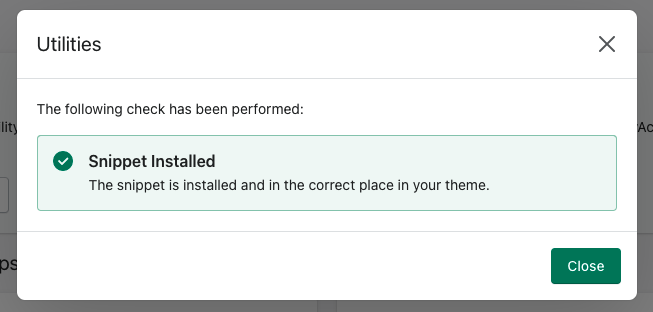
{/} easy-accounts-wishlist.liquidIf the file is not there, navigate to the EasyAccounts’ dashboard by going to Admin -> Apps -> EasyAccounts and run the ‘Utilities’:
Step 2: Snippet Installation
Next, depending on how you would like your Wishlist buttons to be displayed, include them in the correct location in your theme.
Product Page Wishlist Button:
If you have enabled the Wishlist functionality through EasyAccounts’ App Configuration, the Wishlist button will automatically be displayed under the “Add to Cart” button on the product page. If you would like it to be displayed on a different place on the page, you need to edit your theme to include the snippet.
Go to your product template file in your page in your code editor. This might be in Sections/product-template.liquid, or named something similar. Decide where you would like the button to render on the page, and insert the following line of code in place:
{% render "easy-accounts-wishlist", product: product %}
This will overwrite where the Wishlist button is rendered, and insert it where the snippet is instead. Make sure to pass through the ‘product’ in the line of code.
Remember to click ‘Save’ in the top bar to save these changes once you are happy with the buttons position. If you would like to style the Wishlist button for the product pages, you can use the class “ea-wishlist-single-page-button”.
Collection Page Wishlist Button:
If you have enabled the Wishlist functionality through EasyAccounts’ App Configuration, the Wishlist buttons are not displayed on the collection page by default. If you would like to have the Wishlist buttons appear on the collection page for each product, you need to edit your theme to include the snippet.
Find where each product card is being created for your collection pages. This might be in Snippets/product-card.liquid or somewhere similar. You can usually find this file by going to your collection.liquid page and finding which snippet or section file is included in it in a “for loop” of products.
{% for product in collection.products %}
    {% include 'product-card', product: product %}
Once you have found your product card file, decide where you would like the Wishlist button to render, and insert the following line of code in place:
{% render "easy-accounts-wishlist", product: product %}
This will render a Wishlist button for each product displayed on the collection page. Make sure to pass through the ‘product’ in the line of code.
Remember to click ‘Save’ in the top bar to save these changes once you are happy with the buttons position. If you would like to style the Wishlist button for the collection pages, you can use the class “ea-wishlist-collection-page-button”.
Note:
Please note, the snippet Wishlist buttons also follow whether the Wishlist has been enabled or disabled in EasyAccounts’ App Configuration. If the Wishlist is disabled, no Wishlist buttons will be displayed. If you would like the Wishlist buttons to show, remember to enable the Wishlist!